Snipe-IT Deployment on Linux (Ubuntu) via Docker, Apache & Nginx

Snipe-IT is web-based open-source software for asset management.
Table of contents
What is Snipe-IT?
Snipe-IT was made for asset management, to enable departments to track who has which asset, when it was purchased, which software licenses and accessories are available, and so on.
Snipe-IT is a Free Open Source (FOSS) web based project built on Laravel and it follows a standard Laravel MVC file structure.
This project is actively developed and they release quite frequently. Check out the Snipe-IT website for a demo, a comprehensive list of features, screenshots and announcements for updates on new versions.
Website Documentation Demo GitHub
I made a step-by-step guide of Snipe-IT installation, configuration, and its features for the Ministry of Technology Sri Lanka’s official website. I will provide links to each section of that documentation as follows:
Introduction
Overview, introduction, and getting started guide to the Snipe-IT asset management system.
Features
Main features available on the system and a guide on how to use them correctly.
Video Guides
This video guide includes feature reviews, configurations, and how to use the functionalities of the Snipe-IT system; it also includes the mobile application configuration and its features.
Installation
The installation guide covers how to deploy Snipe-IT software on a Linux (Ubuntu) system via Docker, Apache, and Nginx services.
This guide was created in June 2022, and later updates of Snipe-IT may make this guide’s configuration steps slightly different.
Install Snipe-IT via Docker
Install Docker Engine
Note
Find the official guide here. Follow this official guide for install Docker on other Linux distribution systems.
1. Uninstall old versions
sudo apt-get remove docker docker-engine docker.io containerd runc
2. Set up the repository
Update the apt package index and install packages to allow apt to use a repository over HTTPS:
 sudo apt-get update
 sudo apt-get install ca-certificates curl gnupg lsb-release
Add Docker’s official GPG key:
sudo mkdir -p /etc/apt/keyringscurl -fsSL https://download.docker.com/linux/ubuntu/gpg | sudo gpg --dearmor -o /etc/apt/keyrings/docker.gpgUse the following command to set up the repository:
echo \"deb [arch=$(dpkg --print-architecture) signed-by=/etc/apt/keyrings/docker.gpg] https://download.docker.com/linux/ubuntu \$(lsb_release -cs) stable" | sudo tee /etc/apt/sources.list.d/docker.list > /dev/null
3. Install Docker Engine
Update the apt package index, and install the latest version of Docker Engine, containerd, and Docker Compose, or go to the next step to install a specific version:
sudo apt-get install docker-ce docker-ce-cli containerd.ioVerify that Docker Engine is installed correctly;
sudo systemctl is-active docker
Install Snipe-IT via Docker
1. Update/Upgrade installed packages
sudo apt update && sudo apt upgrade
2. Create directories for mount with Docker containers.
Create main directories
sudo mkdir /var/config /var/config/snipeitChange the working directory to newly created snipeit directory.
cd /var/config/ snipeitCreate directories for mount with MySQL container and Snipe-IT container.
sudo mkdir snipe-mysql snipe-conf snipe-backup
3. Create a MySQL container with MySQL version 5.6
Replace the placeholders with your preference.
sudo docker run \
    --name snipe-mysql \
    -d \
    -e MYSQL_ROOT_PASSWORD= <MYSQL_ROOT_PASSWORD> \
    -e MYSQL_DATABASE=snipe \
    -e MYSQL_USER=snipe \
    -e MYSQL_PASSWORD= <MYSQL_USER_PASSWORD> \
    -e TZ=Asia/Colombo \
    -p 127.0.0.1:3306:3306 \
    -v /var/config/snipeit/snipe-mysql:/var/lib/mysql \
    mysql:5.6 --sql-mode=""
4. Create a Snipe-IT Docker image
Option 01:
Generate a new snipe-it container with the latest version.
sudo docker run --rm snipe/snipe-itOption 02:
Generate a new Snipe-IT container with specified version. Find the latest Snipe-IT docker image version here.
sudo docker run --rm snipe/snipe-it:v6.0.2
After the downloading, output should look like this;
Please re-run this container with an environment variable $APP_KEYAn example APP_KEY you could use is:base64:D5oGA+zhFSVA3VwuoZoQ21RAcwBtJv/RGiqOcZ7BUvI=
Copy the APP_KEY (“based64:D5…”) and replace it with the placeholder at the next step (step 5).
5. Start the Snipe-IT container
Option 01: SSL Disabled
- Replace the placeholders with your MySQL details (Step 3) and APP_KEY (\ without an APP_KEY it won’t work*).
sudo docker create \
--name=snipe-it \
--link snipe-mysql:db \
-e PUID=1000 \
-e PGID=1000 \
-e DB_CONNECTION=mysql \
-e DB_HOST=snipe-mysql \
-e DB_DATABASE=snipe \
-e DB_USERNAME=snipe \
-e DB_PASSWORD=[MYSQL_USER_PASSWORD] \
-e APP_KEY=[APP_KEY] \
-p 8082:80 \
-v /var/config/snipeit/snipe-conf:/config \
-v /var/config/snipeit/snipe-backup:/var/www/html/storage/app/backups \
--restart unless-stopped \
snipe/snipe-it
#snipe/snipe-it:v6.0.2
Option 02: SSL Enabled
Replace the placeholders with your MySQL details (Step 3), SSL Port and APP_KEY (* without an APP_KEY it won’t work).
Later, place the SSL Key and SSL Certificate inside the snipe-it docker container using the
docker cpcommand, at/var/lib/snipeit/ssl/snipeit-ssl.crtand/var/lib/snipeit/ssl/snipeit-ssl.key.sudo docker create \ --name=snipe-it \ --link snipe-mysql:db \ -e PUID=1000 \ -e PGID=1000 \ -e DB_CONNECTION=mysql \ -e DB_HOST=snipe-mysql \ -e DB_DATABASE=snipe \ -e DB_USERNAME=snipe \ -e DB_PASSWORD=[MYSQL_USER_PASSWORD] \ -e APP_KEY=[APP_KEY] \ -p 8082:80 \ -p [SSL_PORT]:443 \ -v /var/config/snipeit/snipe-conf:/config \ -v /var/config/snipeit/snipe-backup:/var/www/html/storage/app/backups \ --restart unless-stopped \ snipe/snipe-it # snipe/snipe-it:v6.0.2
6. Start the container.
sudo docker start snipe-it
7. Update the .env file with the site details and email configurations.
Get the docker containers details.
sudo docker psGet into the Snipe-IT container.
sudo docker exec -it CONTAINER_ID /bin/bashDefault docker containers come with VI editor. If you want, you can install VIM or NANO editors using the following commands.
apt-get update apt-get install vim nanoOpen
.envfile with an editor.vi .envUncomment and update the basic app settings. Replace the APP_KEY placeholder with your APP_KEY (Step 4) and APP_URL with your site domain (http://example.com:8082).
  #--------------------------------------------
  # REQUIRED: BASIC APP SETTINGS
  # --------------------------------------------
  APP_ENV=production
  APP_DEBUG=false
  APP_KEY=<APP_KEY>
  APP_URL=http://127.0.0.1:8082
  APP_TIMEZONE=Asia/Colombo
  APP_LOCALE=en
Update the outgoing email server settings.
  # --------------------------------------------
  # REQUIRED: OUTGOING MAIL SERVER SETTINGS
  # --------------------------------------------
  MAIL_DRIVER=smtp
  MAIL_HOST=${MAIL_PORT_587_TCP_ADDR}
  MAIL_PORT=${MAIL_PORT_587_TCP_PORT}
  MAIL_USERNAME=${MAIL_ENV_USERNAME}
  MAIL_PASSWORD=${MAIL_ENV_PASSWORD}
  MAIL_ENCRYPTION=${MAIL_ENV_ENCRYPTION}
  MAIL_FROM_ADDR=${MAIL_ENV_FROM_ADDR}
  MAIL_FROM_NAME=${MAIL_ENV_FROM_NAME}
  MAIL_REPLYTO_ADDR=${MAIL_ENV_FROM_ADDR}
  MAIL_REPLYTO_NAME=${MAIL_ENV_FROM_NAME}
Example with a Gmail
Required to enable “Less secure app” settings at Gmail and generated password. email address only use to send the test email.*
# --------------------------------------------
# REQUIRED: OUTGOING MAIL SERVER SETTINGS
# --------------------------------------------
MAIL_DRIVER=smtp
MAIL_HOST=smtp.gmail.com
MAIL_PORT=587
MAIL_USERNAME=your_username@gmail.com
MAIL_PASSWORD=your_generated_password
MAIL_ENCRYPTION=tls
MAIL_FROM_ADDR=your_username@gmail.com
MAIL_FROM_NAME=’ANY NAME’
MAIL_REPLYTO_ADDR=reciver_email@domain.com
MAIL_REPLYTO_NAME=’ANY NAME’
Save the changes and restart the Snipe-IT container.
  exit
  sudo docker restart snipe-it
8. Snipe-IT pre-flight setup
Browse to the IP address of your Ubuntu server and you should see the pre-flight page (http://example.com:8082).
Install Snipe-IT via Apache
1. Update and upgrade installed packages on Linux server.
sudo apt update && sudo apt upgrade
2. Install Apache, MySQL, PHP, PHP-FPM and PHP dependencies.
Install Apache.
sudo apt install apache2Install MySQL.
sudo apt install mysql-serverInstall PHP and PHP-FPM.
sudo add-apt-repository universesudo apt install php-fpm php-mysqlInstall PHP-Dependencies.
sudo apt-get install -y git unzip php php-curl php-mysql php-gd php-ldap php-zip php-mbstring php-xml php-bcmath php-tokenizer
Check the packages are installed correctly.
MySQL server version & status
mysql –Vorservice mysql statusPHP Version
php --versionApache version & status
apache2 -Vorsystemctl status apache2
3. Configure MySQL Server
Run MySQL secure installation command line wizard and secure the installation.
sudo mysql_secure_installation
Tips
Do you want to Install Validate Password Plugin? : Better use Yes
Change the MySQL root user password. : Enter same password twice
Do you want to remove anonymous users? : Yes
Do you want to stop root login remotely? : Better use No
Do you want to reload privileges table: Yes
Tips
If you get the following error while between the secure installation process, kill the current process and follow these steps; Failed! Error: SET PASSWORD has no significance for user ‘root’@’localhost’ as the authentication method used doesn’t store authentication data in the MySQL server.
Login to MySQL
sudo mysqlRun This ALTER Query to change the authentication parameters. Replace placeholder (newpassword) with your preference.
ALTER USER 'root'@'localhost' IDENTIFIED WITH mysql_native_password by 'newpassword';And now, you are able to run mysql_secure_installation command.
4. Create an initial database and a user for the Snipe-IT
Login to MySQL server, provide password for MySQL root user when it prompts;
sudo mysql -u root -pCreate new database named snipeit_db.
CREATE DATABASE snipeit_db;Create a new user named snipeit_user. Replace the password placeholder with your own.
CREATE USER 'snipeit_user'@'localhost' IDENTIFIED BY 'password';Grant permissions to the user (snipeit_user) on the database (snipeit_db).
GRANT ALL PRIVILEGES ON snipeit_db.* TO 'snipeit_user'@'localhost';Flush the privileges
flush privileges;Exit from the MySQL server.
quit;Restart MySQL service
sudo service mysql restart
5. Download the Snipe-IT latest version.
Change working directory to “/var/www/”
cd /var/www/Clone recent version of the Snipe-IT from GIT into a local folder (snipeit).
sudo git clone https://github.com/snipe/snipe-it snipeit
6. Update the .env file with the site, database and email configuration details.
Change working directory to “/var/www/snipeit/”
cd /var/www/snipeit/Make a copy of
.envenvironmental filesudo cp .env.example .envOpen
.envfile with a text editor.sudo vi .env or sudo nano .envUpdate the basic app settings. Replace the APP_URL with your domain (http://example.com).
  #--------------------------------------------
  # REQUIRED: BASIC APP SETTINGS
  # --------------------------------------------
  APP_ENV=production
  APP_DEBUG=false
  APP_KEY=<APP_KEY>
  APP_URL=http://127.0.0.1:8082
  APP_TIMEZONE=Asia/Colombo
  APP_LOCALE=en
Update the database settings. Replace the “DB_PASSWORD” placeholder with your MySQL snipeit user’s password.
  # --------------------------------------------
  # REQUIRED: DATABASE SETTINGS
  # --------------------------------------------
  DB_CONNECTION=mysql
  DB_HOST=127.0.0.1
  DB_DATABASE=snipeit_db
  DB_USERNAME=snipeit_user
  DB_PASSWORD=<password>
  DB_PREFIX=null
  DB_DUMP_PATH='/usr/bin'
  DB_CHARSET=utf8mb4
  DB_COLLATION=utf8mb4_unicode_ci
Update the outgoing email server settings.
  # --------------------------------------------
  # REQUIRED: OUTGOING MAIL SERVER SETTINGS
  # --------------------------------------------
  MAIL_DRIVER=smtp
  MAIL_HOST=${MAIL_PORT_587_TCP_ADDR}
  MAIL_PORT=${MAIL_PORT_587_TCP_PORT}
  MAIL_USERNAME=${MAIL_ENV_USERNAME}
  MAIL_PASSWORD=${MAIL_ENV_PASSWORD}
  MAIL_ENCRYPTION=${MAIL_ENV_ENCRYPTION}
  MAIL_FROM_ADDR=${MAIL_ENV_FROM_ADDR}
  MAIL_FROM_NAME=${MAIL_ENV_FROM_NAME}
  MAIL_REPLYTO_ADDR=${MAIL_ENV_FROM_ADDR}
  MAIL_REPLYTO_NAME=${MAIL_ENV_FROM_NAME}
Save the changes and exit.
7. Update folder permissions in the Snipe-IT root directory to the user of the Apache.
sudo chown -R www-data:www-data /var/www/snipeit/
sudo chmod -R 755 storage public/uploads
8. Download & Install composer.
Change working directory to the Snipe-IT install directory.
cd /var/www/snipeitDownload the composer.
curl -sS https://getcomposer.org/installer | phpFor local composer installations.
php composer.phar install --no-dev --prefer-sourceFor global composer installations.
composer install --no-dev --prefer-source
9. Generate an APP_Key for the .env file.
sudo php artisan key:generateVerify the generated APP_Key by opening the .env file and check “APP_KEY” value.
cat /var/www/snipeit/.envornano /var/www/snipeit/.env
10. Apache server configurations
Create a new site configuration file with your preferred name.
sudo cp /etc/apache2/sites-available/000-default.conf /etc/apache2/sites-available/snipeit.confOpen the configuration file.
sudo nano /etc/apache2/sites-available/snipeit.confAdd site content as follows, Replace Server Name to your Ubuntu Server’s IP address, and Document root and directory locations to Snipe-IT installation directory public folder (…/snipeit/public/).
<VirtualHost *:80>
   <Directory /var/www/snipeit/public/>
      Allow From All
      AllowOverride None
      Options None
   </Directory>

   DocumentRoot /var/www/snipeit/public/
   ServerName 127.0.0.1

   # Other directives here
   RewriteEngine On
   # From public/.htaccess
   RewriteCond %{DOCUMENT_ROOT}%{REQUEST_FILENAME} !-d
   RewriteCond %{REQUEST_URI} (.+)/$
   RewriteRule ^ %1 [L,R=301]
   RewriteCond %{DOCUMENT_ROOT}%{REQUEST_FILENAME} !-d
   RewriteCond %{DOCUMENT_ROOT}%{REQUEST_FILENAME} !-f
   RewriteRule ^ /index.php [L]
</VirtualHost>
Disable the default site
sudo a2dissite 000-default.confEnable the new site.
sudo a2ensite snipeit.confRestart the Apache service
sudo systemctl reload apache2
11. Snipe-IT pre-flight setup
Browse to IP address of your Ubuntu server and you should see the pre-flight page (http://example.com).
Install Snipe-IT via Nginx
1. Update and upgrade installed packages on Linux server.
sudo apt update && sudo apt upgrade
2. Install NGINX, MySQL, PHP, PHP-FPM and PHP dependencies.
Install NGINX.
sudo apt install nginxInstall MySQL.
sudo apt install mysql-serverInstall PHP and PHP-FPM.
sudo add-apt-repository universesudo apt install php-fpm php-mysqlInstall PHP-Dependencies.
sudo apt-get install -y git unzip php php-curl php-mysql php-gd php-ldap php-zip php-mbstring php-xml php-bcmath php-tokenizerCheck that the packages are installed correctly.
3. Configure MySQL Server
Run MySQL secure installation command line wizard and secure the installation.
sudo mysql_secure_installation
4. Create an initial database and a user for the Snipe-IT
Login to MySQL server, provide password for MySQL root user when it prompts;
sudo mysql -u root -pCreate new database named snipeit_db.
CREATE DATABASE snipeit_db;Create a new user named snipeit_user. Replace the password placeholder with your own.
CREATE USER 'snipeit_user'@'localhost' IDENTIFIED BY 'password';Grant permissions to the user (snipeit_user) on the database (snipeit_db).
GRANT ALL PRIVILEGES ON snipeit_db.* TO 'snipeit_user'@'localhost';Flush the privileges
flush privileges;Exit from the MySQL server.
quit;Restart MySQL service
sudo service mysql restart
5. Download the Snipe-IT latest version.
Change working directory to “/var/www/”
cd /var/www/Clone recent version of the Snipe-IT from GIT into a local folder (snipeit).
sudo git clone https://github.com/snipe/snipe-it snipeit
6. Update the .env file with the site, database and email configuration details.
Change working directory to “/var/www/snipeit/”
cd /var/www/snipeit/Make a copy of
.envenvironmental filesudo cp .env.example .envOpen
.envfile with a text editor.sudo vi .env or sudo nano .envUpdate the basic app settings. Replace the APP_URL with your domain (http://example.com).
  #--------------------------------------------
  # REQUIRED: BASIC APP SETTINGS
  # --------------------------------------------
  APP_ENV=production
  APP_DEBUG=false
  APP_KEY=ChangeMe
  APP_URL=http://127.0.0.1
  APP_TIMEZONE='UTC'
  APP_LOCALE=en
  MAX_RESULTS=500
Update the database settings. Replace the “DB_PASSWORD” placeholder with your MySQL snipeit user’s password.
  # --------------------------------------------
  # REQUIRED: DATABASE SETTINGS
  # --------------------------------------------
  DB_CONNECTION=mysql
  DB_HOST=127.0.0.1
  DB_DATABASE=snipeit_db
  DB_USERNAME=snipeit_user
  DB_PASSWORD=<password>
  DB_PREFIX=null
  DB_DUMP_PATH='/usr/bin'
  DB_CHARSET=utf8mb4
  DB_COLLATION=utf8mb4_unicode_ci
Update the outgoing email server settings.
  # --------------------------------------------
  # REQUIRED: OUTGOING MAIL SERVER SETTINGS
  # --------------------------------------------
  MAIL_DRIVER=smtp
  MAIL_HOST=email-smtp.us-west-2.amazonaws.com
  MAIL_PORT=587
  MAIL_USERNAME=YOURUSERNAME
  MAIL_PASSWORD=YOURPASSWORD
  MAIL_ENCRYPTION=null
  MAIL_FROM_ADDR=you@example.com
  MAIL_FROM_NAME='Snipe-IT'
  MAIL_REPLYTO_ADDR=you@example.com
  MAIL_REPLYTO_NAME='Snipe-IT'
  MAIL_AUTO_EMBED_METHOD='attachment'
Save the changes and exit.
7. Update folder permissions in the Snipe-IT root directory to the user of the Nginx.
sudo chown -R www-data:www-data /var/www/snipeit/sudo chmod -R 755 storage public/uploads
8. Download & Install composer.
Change working directory to the Snipe-IT install directory.
cd /var/www/snipeitDownload the composer.
curl -sS https://getcomposer.org/installer | phpFor local composer installations.
php composer.phar install --no-dev --prefer-sourceFor global composer installations.
composer install --no-dev --prefer-source
9. Generate an APP_Key for the .env file.
sudo php artisan key:generateVerify the generated APP_Key by opening the .env file and check “APP_KEY” value.
cat /var/www/snipeit/.envornano /var/www/snipeit/.env
10. NGINX server configurations
Create a new site with your preferred name.
sudo nano /etc/nginx/sites-available/site_nameAdd site content as follows, Replace Server Name to your Ubuntu Server’s IP address, root location to Snipe-IT installation directory public folder, and the PHP-FPM version (Ex: php-fpm7.4 as php7.4-fpm).
server {
listen 80;
listen [::]:80;

server_name  127.0.0.1;
root  /var/www/snipeit/public/;
index  index.php index.html index.htm;
access_log /var/log/nginx/site_name.access.log;
error_log /var/log/nginx/site_name.error.log;

location / {
   try_files $uri $uri/ /index.php$is_args$args;
}
location ~ \.php$ {
   include snippets/fastcgi-php.conf;
   fastcgi_pass unix:/var/run/php/php7.4-fpm.sock;
   include fastcgi_params;
   fastcgi_param SCRIPT_FILENAME $document_root$fastcgi_script_name;
   fastcgi_intercept_errors on;
   }
}
Enable the new site.
sudo ln -s /etc/nginx/sites-available/site_name /etc/nginx/sites-enabled/Disable default site
sudo unlink /etc/nginx/sites-enabled/defaultRestart Nginx service
sudo service nginx restart
11. Snipe-IT pre-flight setup
Browse to IP address of your Ubuntu server and you should see the pre-flight page (http://example.com).
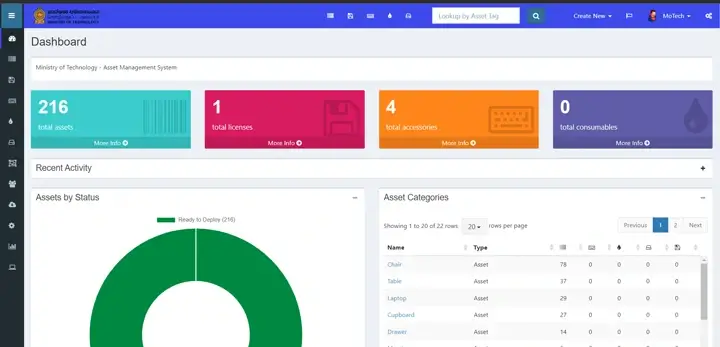
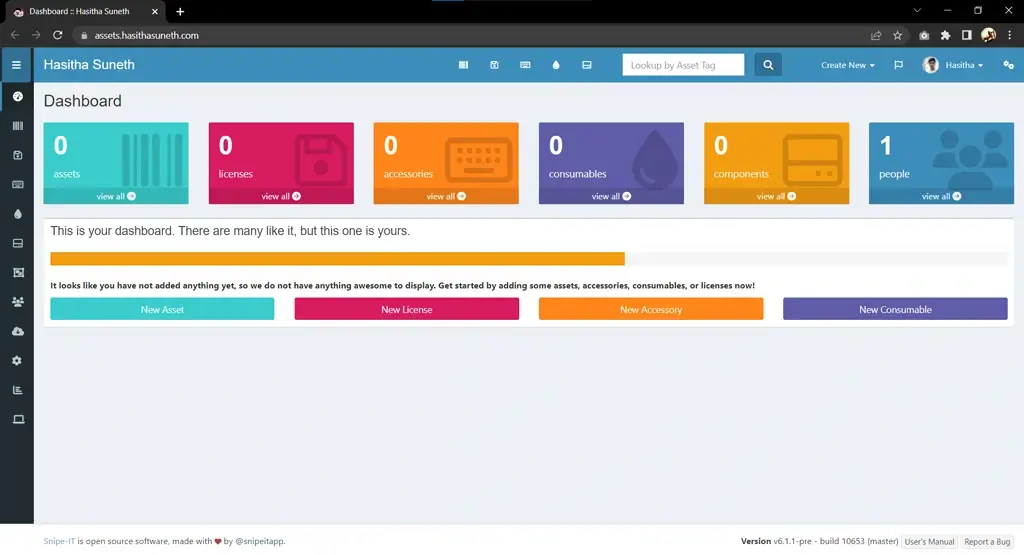
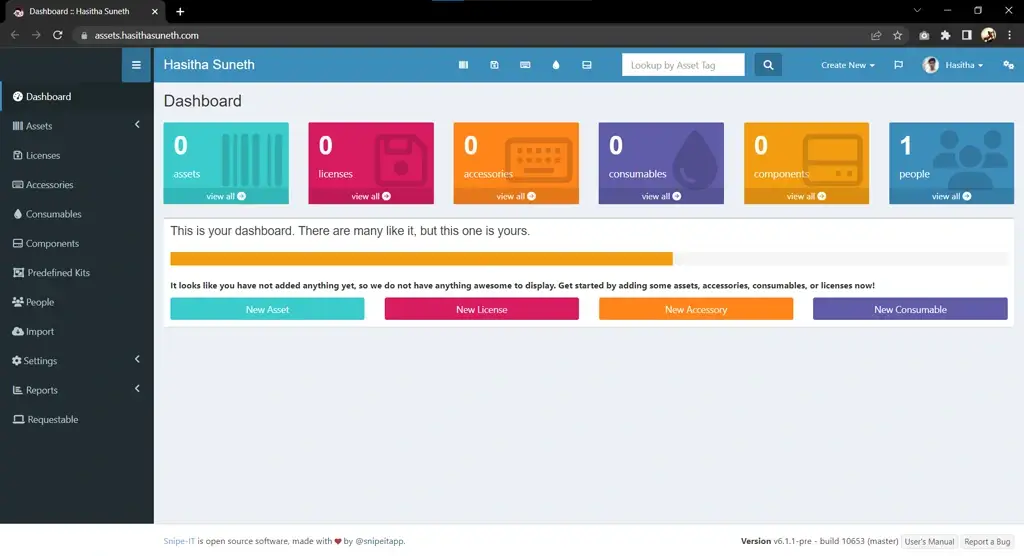
Pre-Flight
Screenshots
Copyright © 2025 Hasitha Suneth. Created With ♡ By Jekyll & Just-The-Docs


